Whether you prefer big bold statements or small delicate accents, adding crochet to your clothes can be a great way to update and personalize your wardrobe. Making a full garment can be intimidating at times, requiring a big investment in time, patience, and materials. By crochet hacking your existing clothing, you can update out of style pieces or add an artistic flair to your wardrobe with less investment.
The biggest key to crochet hacking is to being able to improvise and adapt. Your ability and willingness to “wing it” will only add to your wearable art. Don’t be afraid to make mistakes!


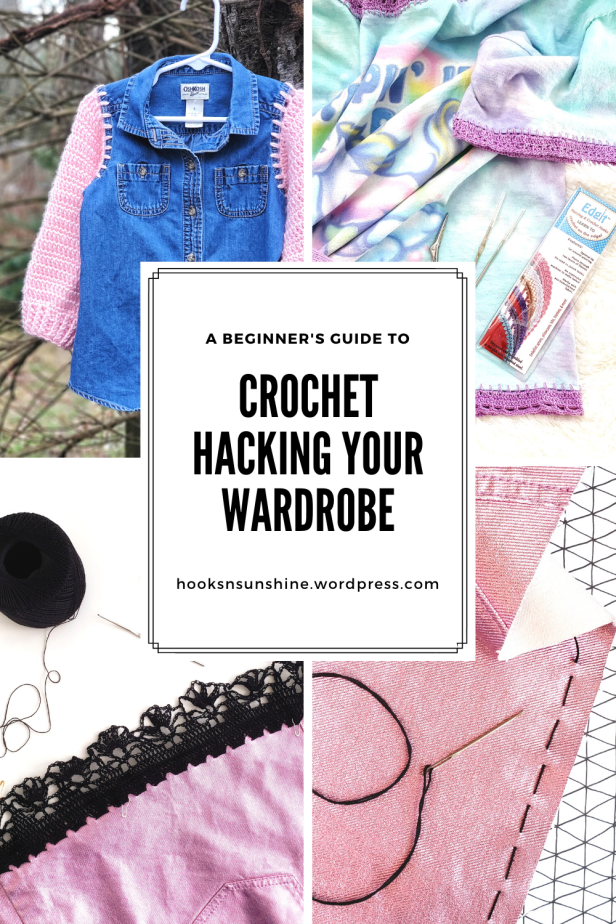
Step One: Pick Your Pieces
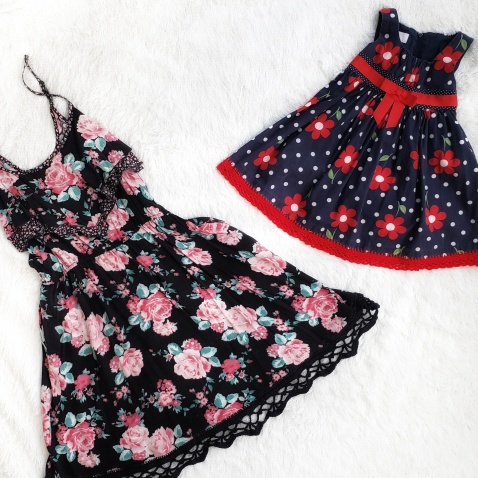
Do you have an old t-shirt that would benefit from a facelift? Maybe a dress or skirt that’s just a little too short or in need of pockets? Search your closet for those pieces that you just aren’t feeling anymore, or take a trip to your favorite thrift shop with modification in mind. If you have kids in your life, you may want to try a child size project first, since you can work on a smaller scale. Remember, plain pieces can quickly become a statement piece with the right treatment!
Step Two: Envision Your Hack
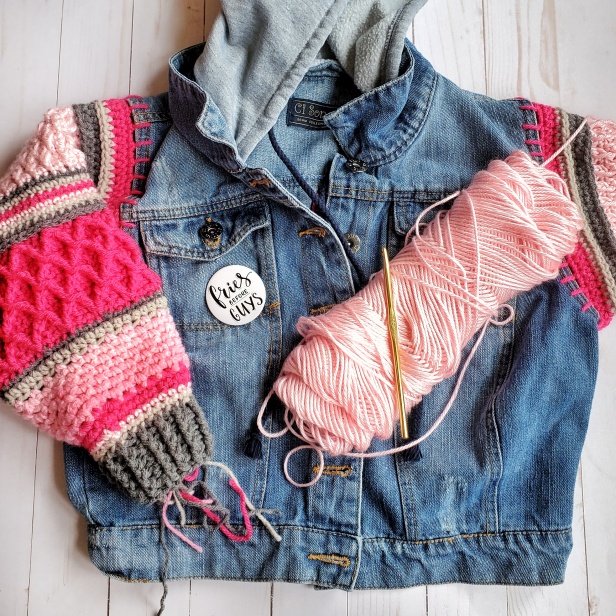
Look at your piece and decide what it needs. Focus on how you want it to look and what it needs. Is it a too-short skirt? A crop top that could use a little less crop and a little more top? Your favorite jeans with a hole that’s out of control? This is your chance to improve as well as personalize.
The type of piece will also help determine what embellishments you add. For example, adding an edging to the bottom of pant legs may be easily ruined by wearing them, but replacing a back pocket, filling in a hole, or adding a bit of flair to the leg would add eye-catching details with longevity.
With this step, you are essentially defining your goals for your project. Make notes or sketches of what you envision, keeping in mind that you will likely make modifications as you go. This is your chance to get creative. Don’t dwell on how to do it in this step; focus on determining what your vision is first.
Step Three: Get Logistical
First, think about the fabric. If it is something that unravels easily, you won’t want to cut into it without making a new seam. If sewing isn’t your thing, it may be best to stick with existing seams or fabric that won’t unravel easily. Consider how the fiber you want to use will work with the existing fabric of the piece.
How will you create your vision? Are you adding appliques, edging, or pockets? What materials will you use? What method will you use to attach your crochet? Will you use a pattern or make it up as you go? Now is the time to answer these questions.
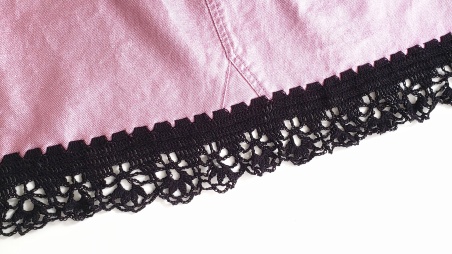
Vintage edging patterns are a wonderful resource to keep in mind. Many adapt easily to a larger scale, and there are hundreds of tried and true patterns available. I like browsing Free Vintage Crochet for ideas.
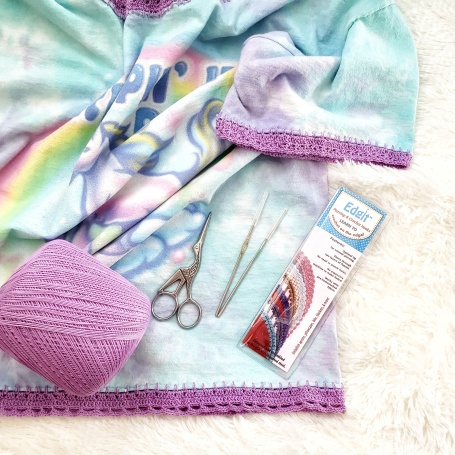
Step Four: Collect Your Materials
In addition to your yarn, you will likely need a good pair of scissors, a strong sewing or embroidery needle, a yarn needle, thick thread, and a crochet hook in the appropriate size for your yarn. If you are planning on using crochet thread for edging, you may want to consider an Edgit hook. This hook has a sharpened end to pierce through fabric, giving you the ability to make crochet stitches directly onto your fabric. I find it especially helpful when I don’t want to sew stitches to crochet onto.
Step Five: Make it Happen
By now, you should be prepared and ready to get started! Do you have a pattern or stitch in mind to use? If you’re converting an existing pattern, make sure to make a gauge swatch to help see how many repeats of the pattern you will need to make, and how many stitches you will need in your first row. Winging it? Check your stitches after a few inches to make sure that they aren’t bunching together too much, or stretched too far apart. Keep notes as you work so you can duplicate if necessary, and keep track of stitch counts if you want to change up your stitches.
The most important part to keep in mind is to have fun! Nothing about this project needs to be perfect. You are taking a generic piece of clothing and turning it into an expression of yourself; it’s wearable art!
Click here for Part 1: Crochet Hacking: Methods for Attaching Crochet to Clothing

What a great idea, thank you for sharing that, I might have a go in my own wardrobe, fab
LikeLike